Después de montar el BASIC con FADU me lie a la cabeza y decidí simplificar todo el montaje y montarlo sobre un Sonoff S26 que tiene una salida directa de enchufe.
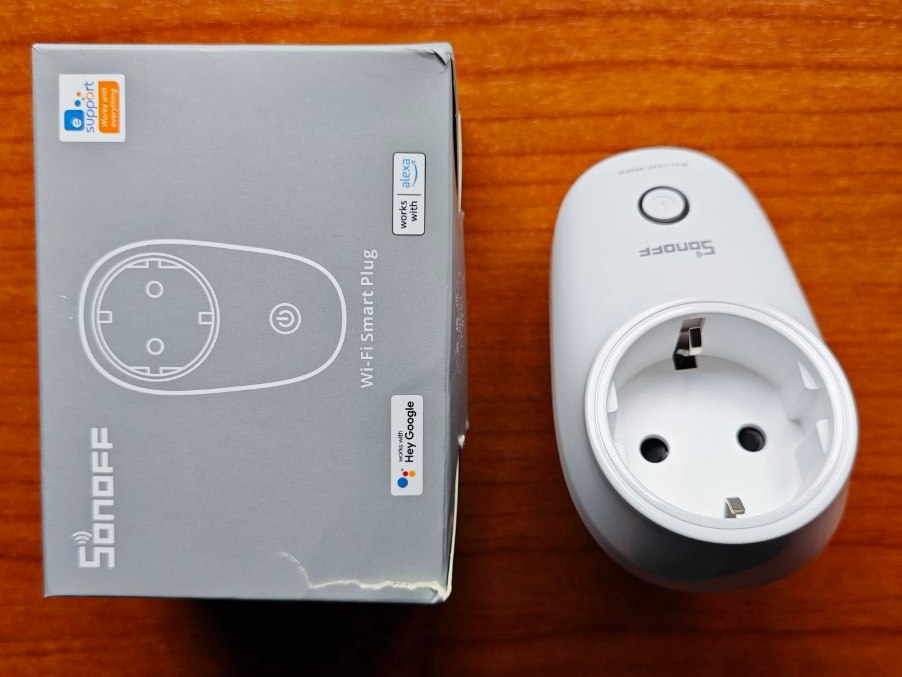
Las entradas y salidas son exactamente las mismas que el BASIC por lo que directamente el firmware del BASIC serviria directamente.
- GPIO00 – BUTTON
- GPIO12 – RELAY
- GPIO13 – LED1
- GPIO03 – RX PIN
- GPIO01 – TX PIN
Pero ya que estamos decidí añadirle al código algunas funcionalidades que creo que no estan de mas , le he añadido lo siguiente :
- El pulsador ahora hace algo , antes no hacia nada , ahora si lo pulsas una vez activa la salida y si se pulsa de nuevo la desactiva.
- Actualizaciones OTA por si hay que actualizar en firmware alguna vez sin tener que desmontar y andar soldando y desoldando.
El código modificado quedaria de la siguiente forma :
/*** Create a Wi-Fi access point and provide a web server on it ***/
#include <ESP8266WiFi.h>
#include <WiFiClient.h>
#include <ESP8266WebServer.h>
// Simple OTA
#include "ESP8266mDNS.h"
#include "ArduinoOTA.h"

int buttonState = 0;
int lastButtonState = 0;

/*** Use AP IP Addr: 10,0,0,1 ***/
IPAddress local_IP(10,0,0,1);
IPAddress gateway(10,0,0,1);
IPAddress subnet(255,0,0,0);

/*** AP Credentials - feel free to change ***/
const char *ssid = "FADUTimer";
const char *password = "fadu1234"; // Reccommend changing this - must be at least 8 characters

/*** Start the web sever ***/
ESP8266WebServer server(80);

/*** routine to send on connect to web server ***/
void handleRoot() {
  server.send(200, "text/html", "<h1>You are connected</h1>");
}

/*** sonoff stuff ***/
int gpio13Led = 13;
int gpio12Relay = 12;
int gpio0RButon = 0;

/**** Initialise ***/
void setup() {

  delay(1000);
  Serial.begin(115200);
  Serial.println();
  Serial.print("Configuring access point...");
  Serial.println(WiFi.softAPConfig(local_IP, gateway, subnet) ? "Ready" : "Failed!");
  Serial.print("Setting soft-AP SSID & Pwd... ");
  Serial.println(WiFi.softAP(ssid, password) ? "Ready" : "Failed!");
  /*** Debug config OK ***/
  IPAddress myIP = WiFi.softAPIP();
  Serial.print("AP IP address: ");
  Serial.println(myIP);
  server.on("/", handleRoot);
  /*** sonoff stuff ***/
  pinMode(gpio13Led, OUTPUT);
  digitalWrite(gpio13Led, HIGH);
  pinMode(gpio12Relay, OUTPUT);
  digitalWrite(gpio12Relay, LOW);
  pinMode(gpio0RButon, INPUT);

  /*** Routines to handle lamp control commands ***/
  /* "/on" = switch enlarger lamp on */
  server.on("/on", [](){
    digitalWrite(gpio13Led, LOW);
    digitalWrite(gpio12Relay, HIGH);
    delay(500);
  });

  /* "/off" = switch enlarger lamp off */
  server.on("/off", [](){
    digitalWrite(gpio13Led, HIGH);
    digitalWrite(gpio12Relay, LOW);
    delay(500);
  });

  ArduinoOTA.setPort(1080);
  server.begin();
  Serial.println("HTTP server started");
  // OTA
  ArduinoOTA.onStart([]() {
    String type;
    if (ArduinoOTA.getCommand() == U_FLASH) {
      type = "sketch";
    } else { // U_FS
      type = "filesystem";
    }

    // NOTE: if updating FS this would be the place to unmount FS using FS.end()
    Serial.println("Start updating " + type);
  });
  ArduinoOTA.onEnd([]() {
    Serial.println("\nEnd");
  });
  ArduinoOTA.onProgress([](unsigned int progress, unsigned int total) {
    Serial.printf("Progress: %u%%\r", (progress / (total / 100)));
  });
  ArduinoOTA.onError([](ota_error_t error) {
    Serial.printf("Error[%u]: ", error);
    if (error == OTA_AUTH_ERROR) {
      Serial.println("Auth Failed");
    } else if (error == OTA_BEGIN_ERROR) {
      Serial.println("Begin Failed");
    } else if (error == OTA_CONNECT_ERROR) {
      Serial.println("Connect Failed");
    } else if (error == OTA_RECEIVE_ERROR) {
      Serial.println("Receive Failed");
    } else if (error == OTA_END_ERROR) {
      Serial.println("End Failed");
    }
  });
  ArduinoOTA.begin();
  Serial.println("Ready v 1.0");
  Serial.print("IP address: ");
  Serial.println(WiFi.localIP());
}

void loop() {
  server.handleClient();
  ArduinoOTA.handle();

  delay(50);
  buttonState = digitalRead(gpio0RButon);
  if (buttonState != lastButtonState)
  {
    if (buttonState == HIGH)
    {
      Serial.println("cambio ....");
      digitalWrite(gpio13Led, !digitalRead(gpio13Led));
      digitalWrite(gpio12Relay, !digitalRead(gpio12Relay));
    }
  }
  lastButtonState = buttonState;
}
Aquí os dejo el código ya compilado para subirlo directamente.
Lo primero que haremos será desmontarlo quitando los tres tornillos estrella que trae.
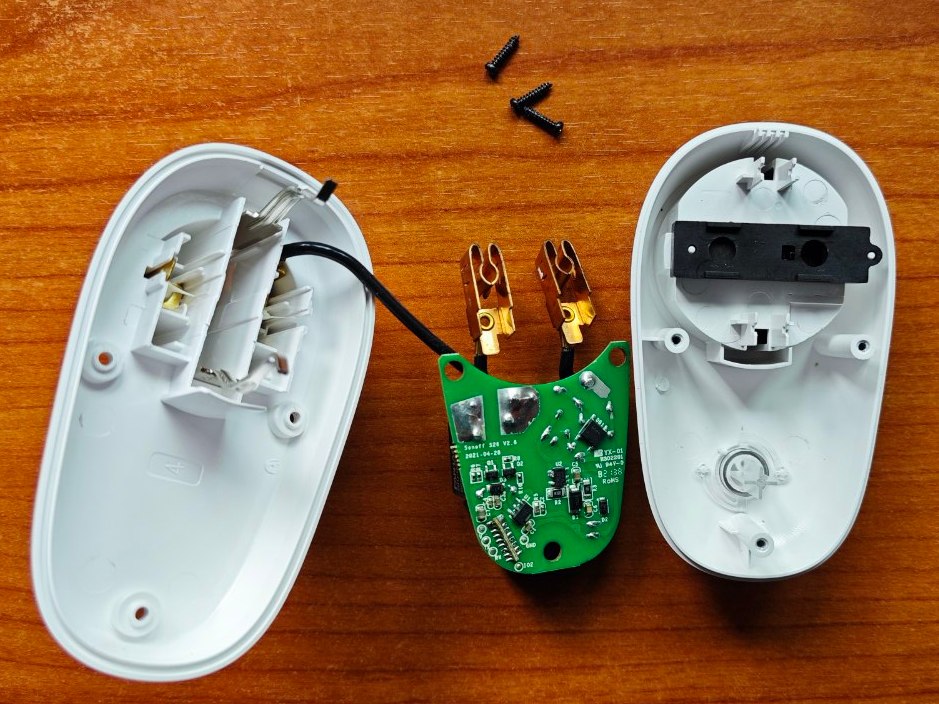
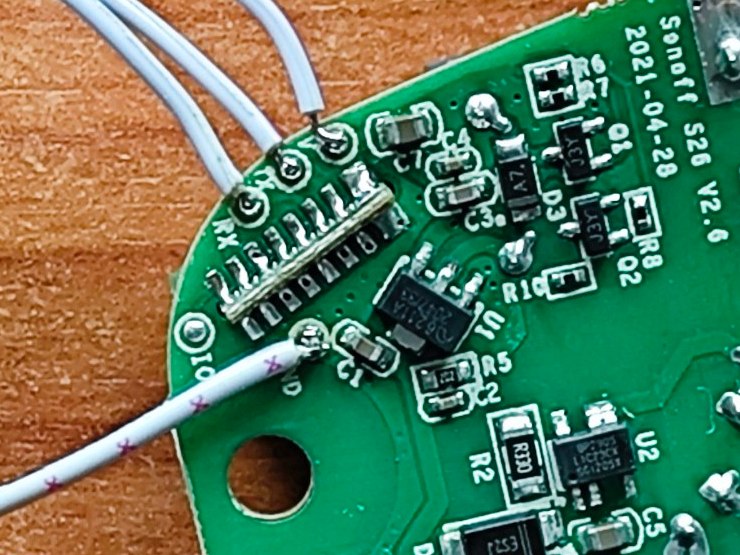
Veremos los pines de alimentación y comunicaciones en la parte inferior de la placa.
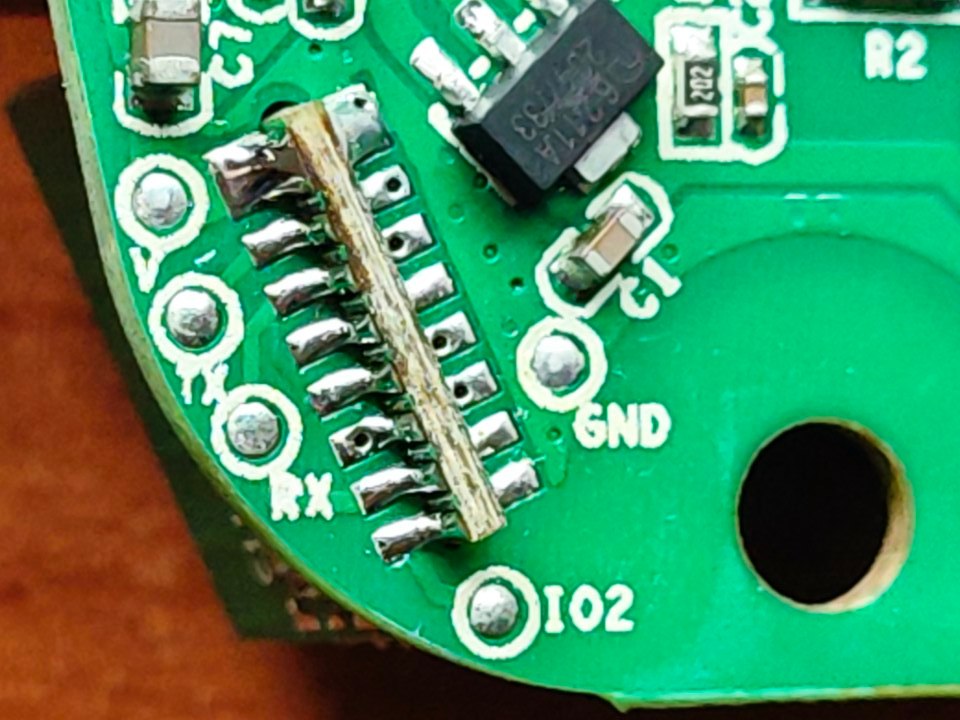
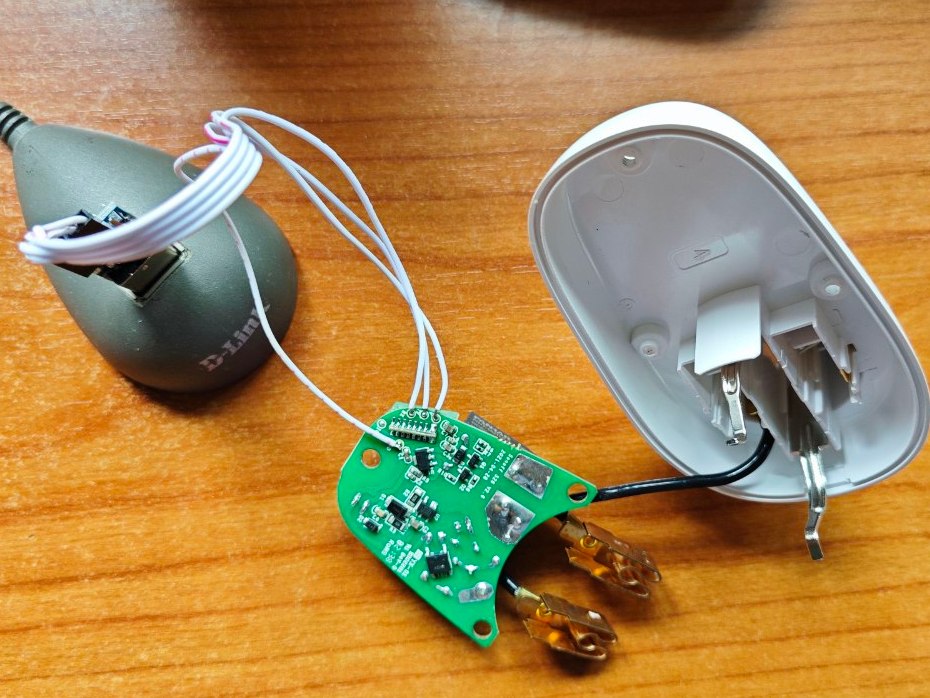
Soldaremos con cuidado los cuatro cables del adaptador , teniendo en cuenta que RX y TX van cruzados y va alimentado a 3,3 Vdc
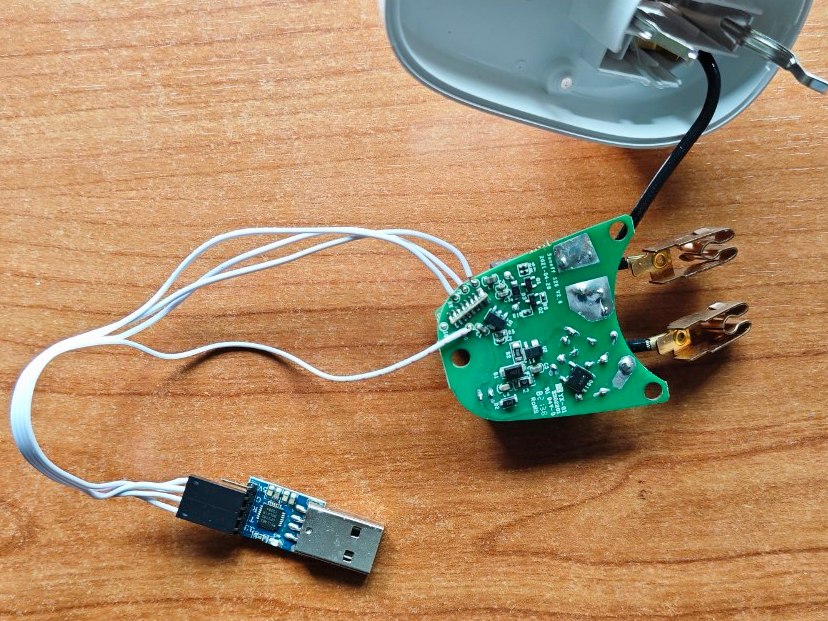
Quedaria de la siguiente forma
Para ponerlo en modo de programación le daremos alimentación pulsando previamente el pulsador de la placa
Para programarlo usaremos Tasmotizer como en otras ocasiones , lo podemos encontrar en https://github.com/tasmota/tasmotizer
Seleccionamos el COM que nos aparece al insertar el USB 232 y el fichero binario a subir

Marcaremos que borre la memoria del dispositivo antes de escribir el nuevo firmware

Si todo es correcto nos aparecerá que el proceso ha acabado sin problemas

Al reiniciarlo nos aparecerá el AP que crea , como en la ocasión anterior entraremos con la contraseña fadu1234

Si lo probamos funcionara como en la versión para el BASIC , pero ahora el pulsador si tiene funcionalidad por si lo queremos usar para otros menesteres.

Y con esto y un bizcocho ….
