Hace poco cayo en mis manos un Gateway DGNWG02LM , ya tenia tres que integre en su dia y la verdad es que funcionan muy bien , tanto como luz de cortesia , para avisos visuales y avisos sonoros , y lo fui a integrar como se hacia hace unos años , pero mis coj .. veintitrés.
Antes mediante la aplicación Mi Home obtenías la KEY y la usabas directamente , pero ahora no hay forma directa de hacerlo y telita con la nueva forma de hacerlo , a ello se le suma que con los nuevos firmwares han bloqueado el puerto al que se accedia directamente para tener control via LAN , vamos una tocada de webs.
Yo uso Mi Home VEVS para saltarme las restricciones geográficas en mis dispositivos
Lo primero será sacar el token con VEVS
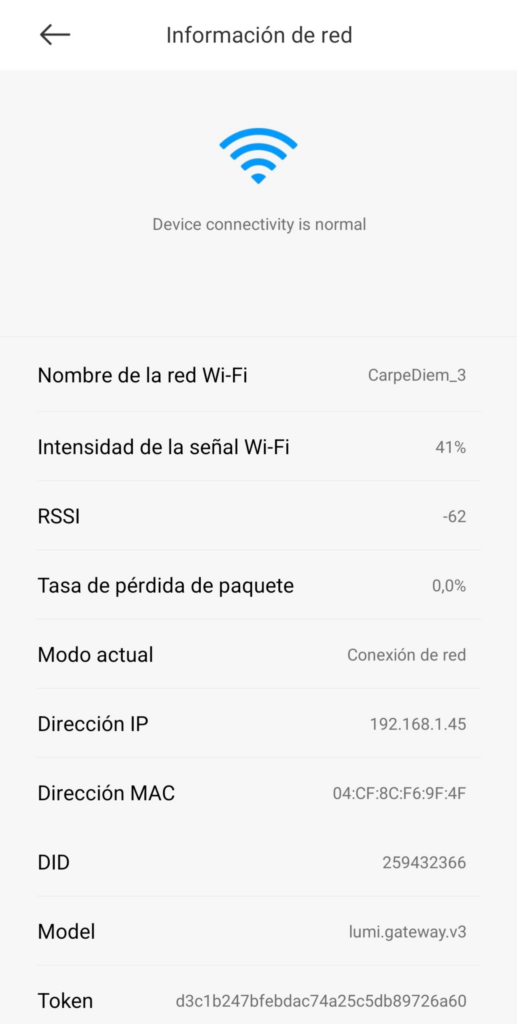
Ya tenemos el token , en este caso será el d3c1b247bfebdac74a25c5db89726a60
Ahora tenemos que poner nosotros una key a nuestra elección de 16 caracteres alfanumérica , lo haremos siguiendo este proyecto https://github.com/rytilahti/python-miio
Para ahorrarme problemas de versiones de Python y demás tonterias lo instalare en el docker de mi Home Assistant
pip install python-miio
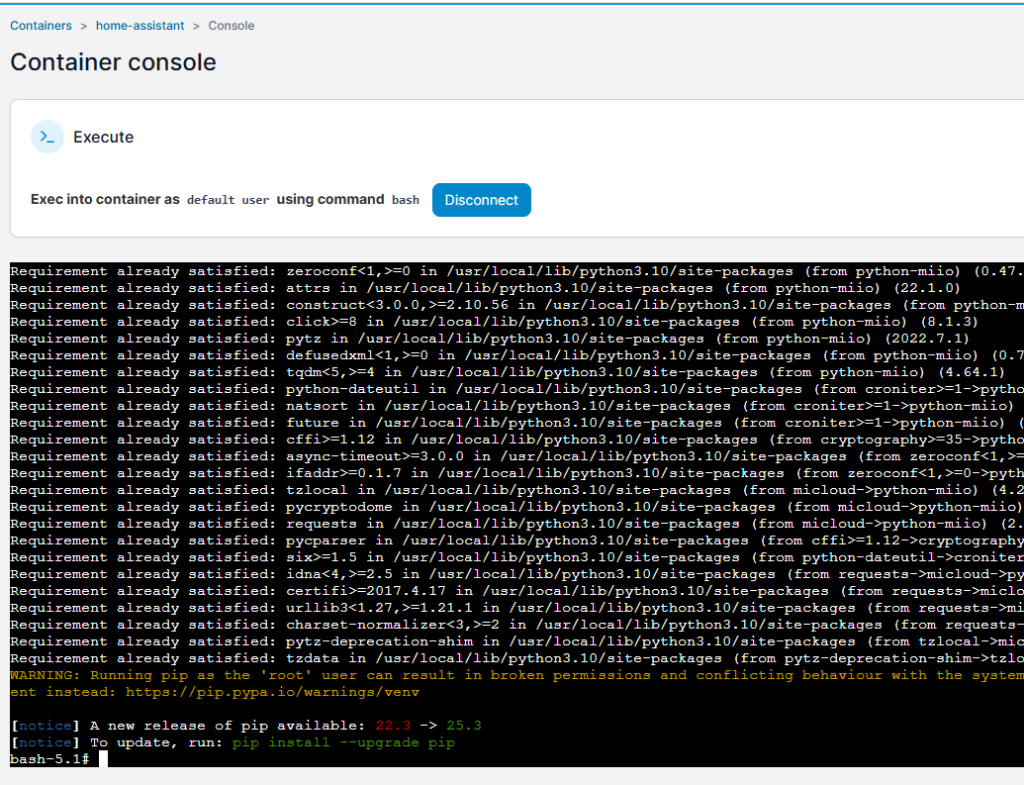
Una vez instalado ejecutaremos el siguiente comando
miiocli gateway --ip 192.168.1.45 --token d3c1b247bfebdac74a25c5db89726a60 set_developer_key 0123456789012345
0123456789012345 será la key que le asignare y el Gateway lo había configurado en la IP 192.168.1.45
Si devuelve el OK entonces vamos por el buen camino

Esto serian los parámetros que le pondremos en nuestro secrets.yaml
######## GATEWAY XIAOMI 4 ########
gateway_4_key: 0123456789012345
gateway_4_mac: 04CF8CF69F4F
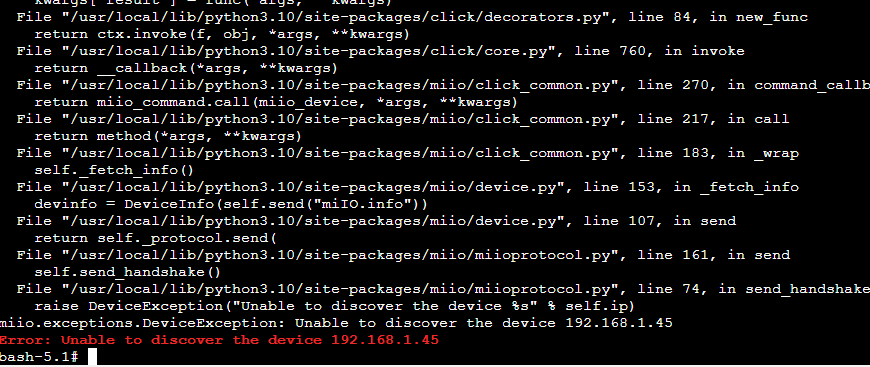
Vamos a ver como esta el tema de puertos , ejecutamos el siguiente comando
miiocli -d gateway --ip 192.168.1.45 --token d3c1b247bfebdac74a25c5db89726a60 enable_telnet
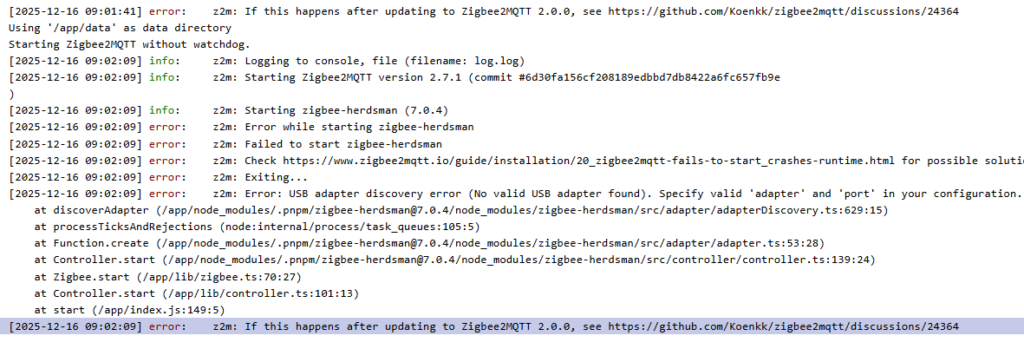
Y vemos que la respuesta nos da un error , malooooooo , muy malooooooooooooooooo
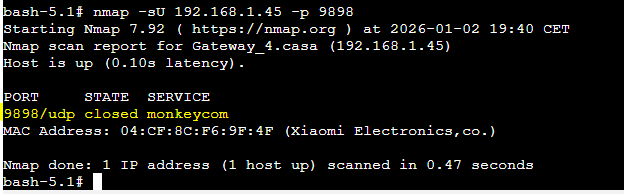
Para probar el puerto ejecutamos este comando de nmap
sudo nmap -sU 192.168.1.45 -p 9898
y vemos como nos dice que esta cerrado el puerto
No queda otra opción que abrir el cacharro , para ello seguiremos el manual de https://community.openhab.org/t/solved-openhab2-xiaomi-mi-gateway-does-not-respond/52963/171
Tiene tres tornillos en la parte inferior que debemos quitar
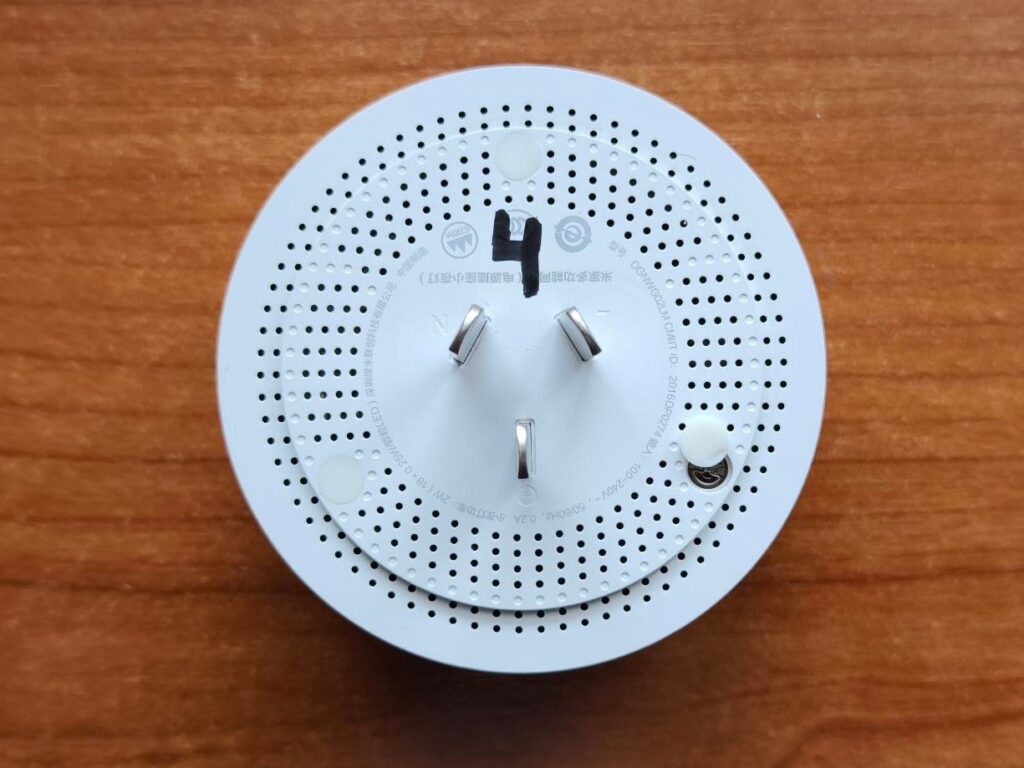
Estos tornillos tienen una forma bien curiosa

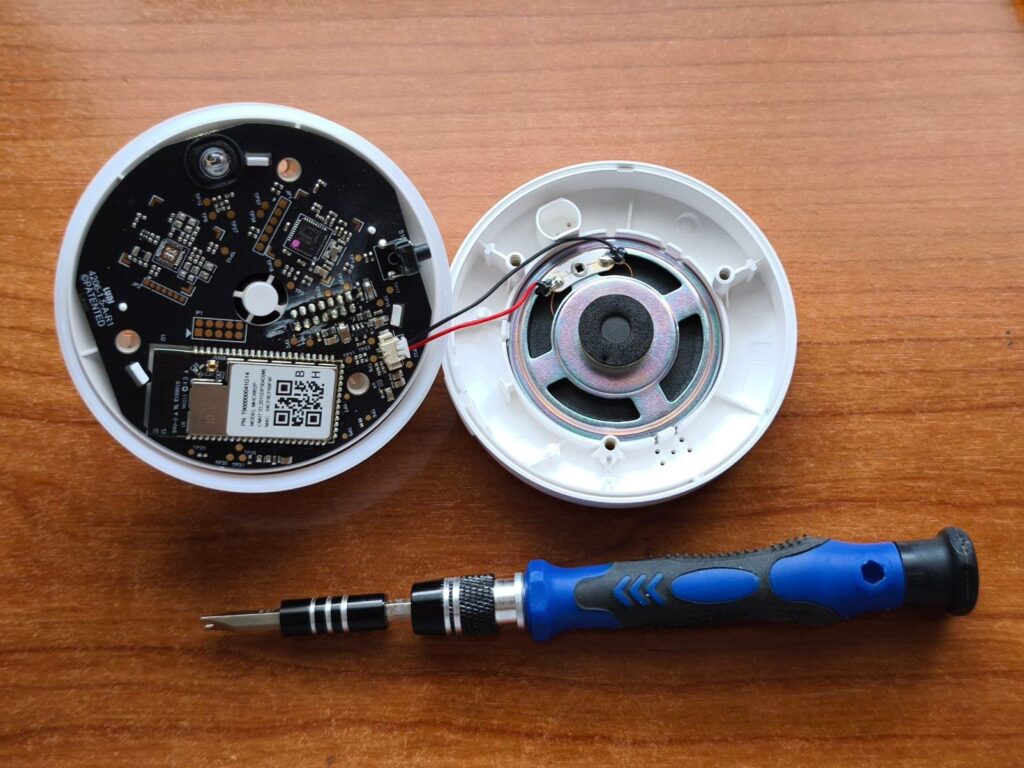
Una vez abierto separamos al parte del altavoz
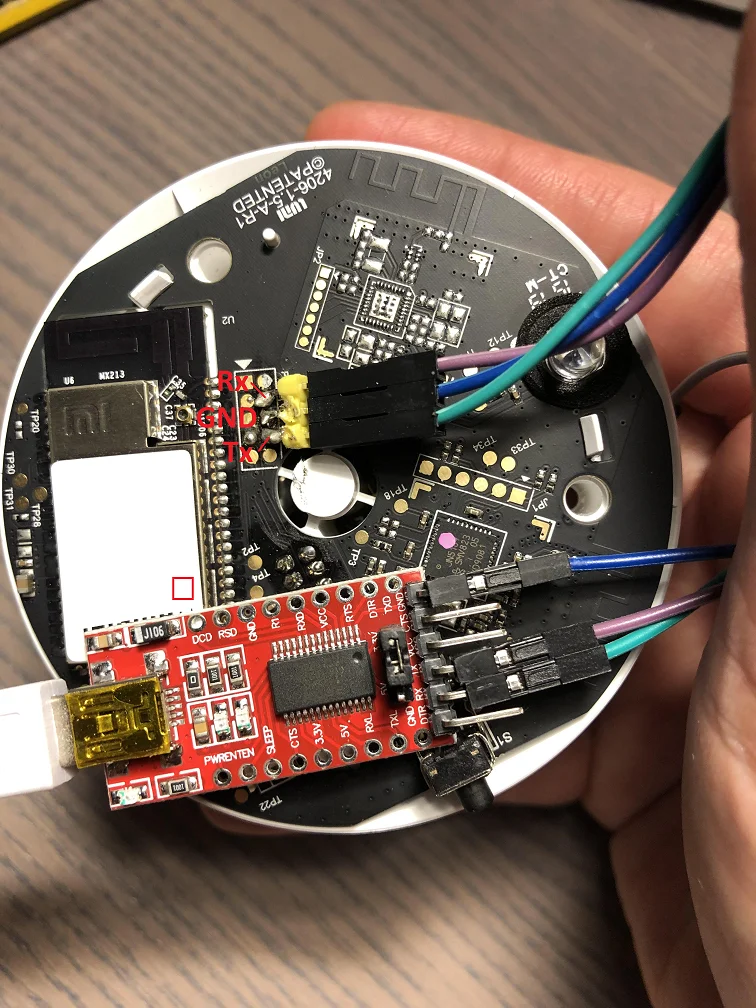
Al no tener comunicación via wifi no nos queda mas remedio que conectarnos via UART , tendremos que soldar SOLO TRES CABLES , RX , TX y GND , no soldar la alimentación ya que tendremos que conectar el dispositivo a 220 mientras nos comunicamos con el
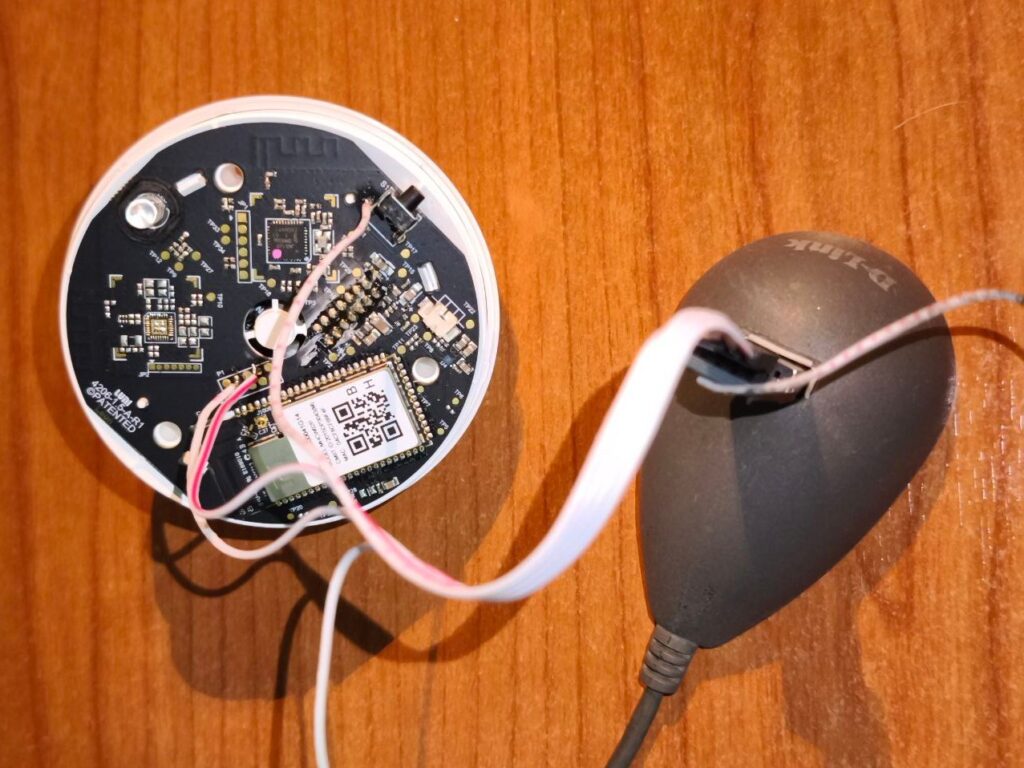
GND lo podemos coger de la carcasa del pulsador
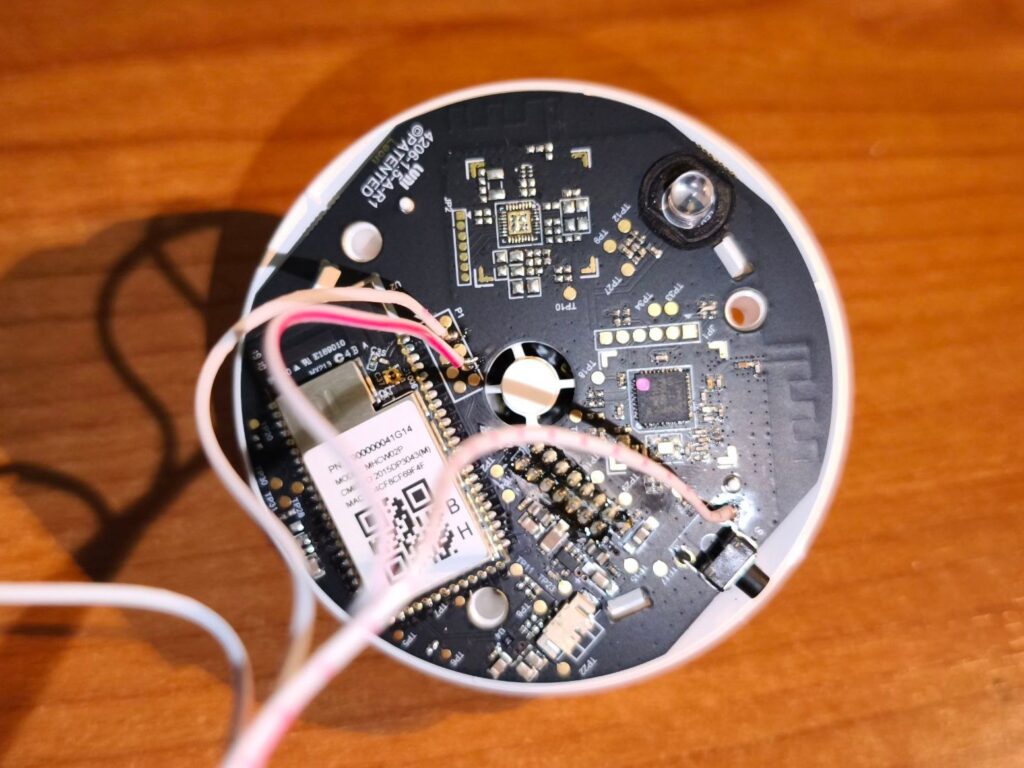
Otra opción seria coger GND del conector directamente
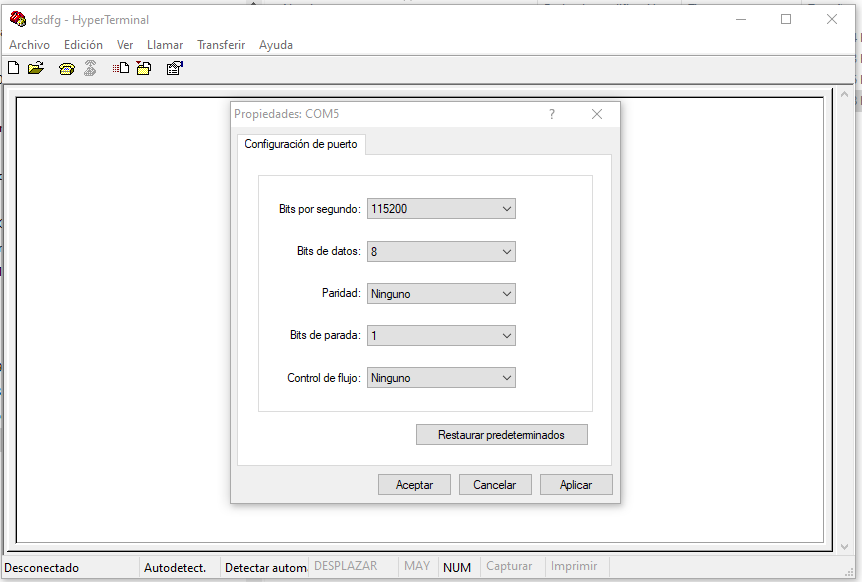
Yo para comunicarme prefiero usar el hyperterminal de toda la vida , pero en las ultimas versiones de Windows no viene , pero lo podemos descargar de aquí mismo
Conectamos el Gateway y el adaptador USB a RS232

Los parámetros de comunicación son 115200, 8,N,1,N
Enviamos el comando psm-set network.open_pf 3 , y lo comprobamos con el comando psm-get network.open_pf para asegurarnos de que esta abierto
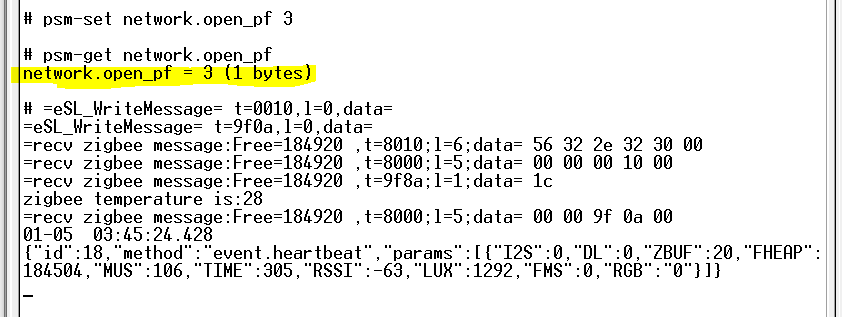
reiniciamos el gateway y si queremos opcionalmente podemos comprobar que el puerto 4321 esta abierto con el comando nmap -sU -p 4321 192.168.1.45
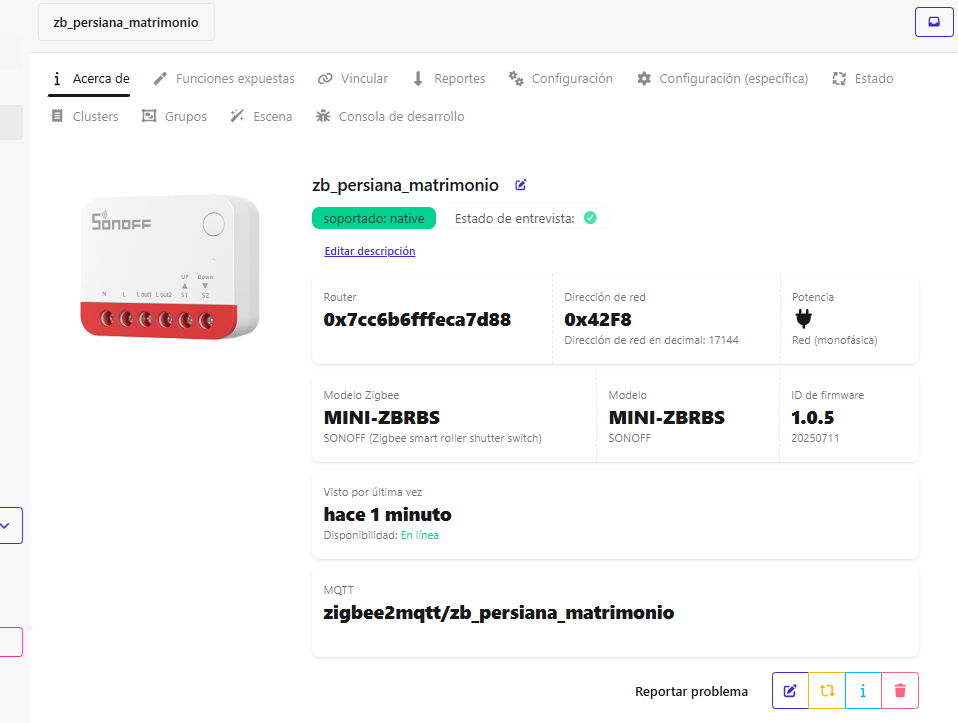
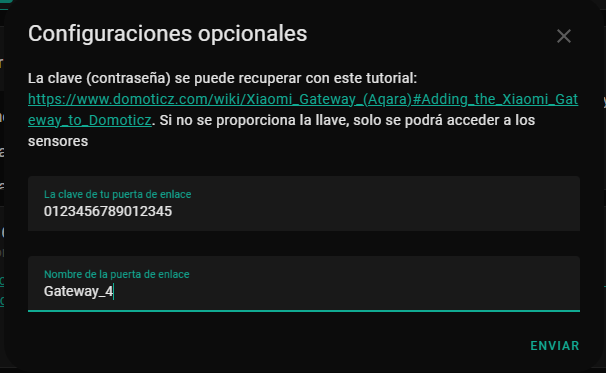
Al entrar en Home Assistant vemos como nos lo ha detectado ya
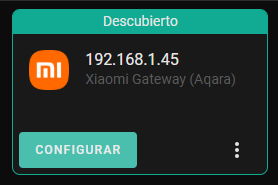
Ahora es donde tenemos que poner la KEY que habíamos grabado en el cacharro
Si todo es correcto nos lo reconoce al momento
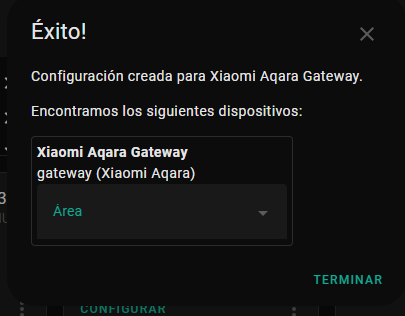
Ya nos aparece el dispositivo con su MAC, en este caso seria light.gateway_light_04cf8cf69f4f
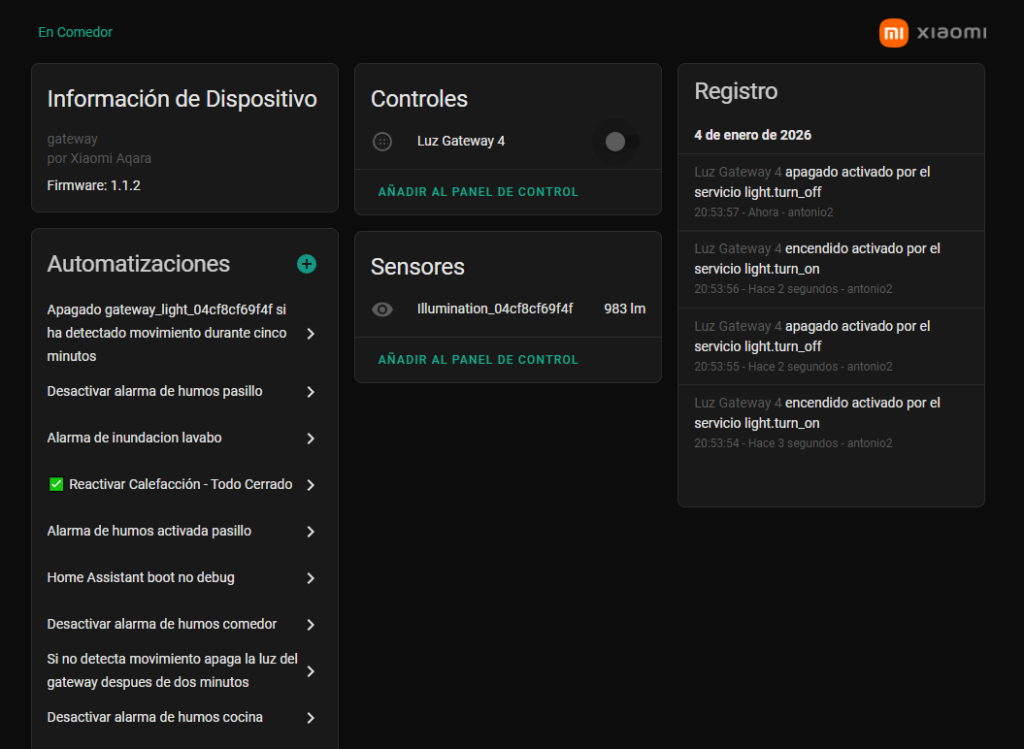
Lo ponemos bonito en el customize.yaml
light.gateway_light_04cf8cf69f4f:
  friendly_name: Luz Gateway 4
  icon: mdi:blur-radial
Ahora ya podemos empezar a trastear con el en nuestras automatizaciones , en este caso lo añadiré a la de parada de la caldera por apertura de puertas o ventanas
# ================================
# 🛑 DESACTIVACIÓN POR PUERTAS/VENTANAS
# ================================

- id: apagar_calefaccion_puertas_balcones_abiertas_5min
  alias: "🚪 Apagar Calefacción - Puertas Balcones Abiertas 5min"
  description: "Apaga la calefacción si puertas/balcones están abiertos más de 5 minutos"
  initial_state: true
  mode: restart
  trigger:
    - platform: state
      entity_id:
        - binary_sensor.sensor_balcon_comedor_derecho_evento
        - binary_sensor.sensor_balcon_comedor_izquierdo_evento
        - binary_sensor.sensor_balcon_matrimonio_derecho_evento
        - binary_sensor.sensor_balcon_matrimonio_izquierdo_evento
        - binary_sensor.sensor_oriol_derecho_evento
        - binary_sensor.sensor_oriol_izquierdo_evento
      to: 'on'
      for:
        minutes: 5
  condition:
    - condition: state
      entity_id: climate.calefaccion_casa
      state: heat
  action:
    - service: climate.turn_off
      target:
        entity_id: climate.calefaccion_casa

    - service: notify.notif_telegram_bot
      data:
        message: |
          ❄️🚪 *Calefacción APAGADA*

          ⚠️ Puerta/balcón abierto >5min
          🚪 Sensor: {{ trigger.to_state.attributes.friendly_name }}
          🌡️ Temperatura: {{ states('sensor.temperatura_comedor_calibrada') }}°C

    - service: light.turn_on
      entity_id: light.gateway_light_7c49eb1d1d0a
      data:
        brightness: 255
        rgb_color: [4, 29, 247]
    - service: light.turn_on
      entity_id: light.gateway_light_286c07f0e736
      data:
        brightness: 255
        rgb_color: [4, 29, 247]
    - service: light.turn_on
      entity_id: light.gateway_light_286c07f0b574
      data:
        brightness: 255
        rgb_color: [4, 29, 247]
    - service: light.turn_on
      entity_id: light.gateway_light_04cf8cf69f4f
      data:
        brightness: 255
        rgb_color: [4, 29, 247]

    # TTS solo entre las 8:00 y las 23:00
    - choose:
        - conditions:
            - condition: time
              after: "08:00:00"
              before: "23:00:00"
          sequence:
            - service: tts.google_translate_say
              data:
                language: "es-es"
                entity_id:
                  - media_player.lenovo_smart_clock
                  - media_player.lenovo_lenovo_matrimonio
                  - media_player.googlehome2670
                message: 'Apagado de la caldera , alguna puerta abierta'


    #Apagamos las luces azules a los quince minutos
    - delay: 00:15:00

    - service: light.turn_off
      entity_id: light.gateway_light_7c49eb1d1d0a
    - service: light.turn_off
      entity_id: light.gateway_light_286c07f0e736
    - service: light.turn_off
      entity_id: light.gateway_light_286c07f0b574
    - service: light.turn_off
      entity_id: light.gateway_light_04cf8cf69f4f
Y con esto y un bizcocho ……