
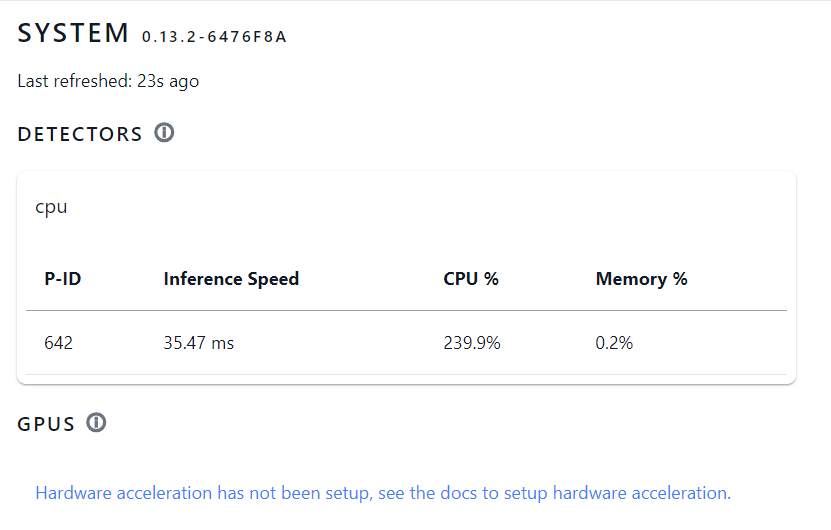
Después de probar , configurar y optimizar Frigate me daba bastantes falsos positivos , esto venia dado por el valor de interferencia que era de 34,7 ms , este valor hay que multiplicarlo por 5 fps por cámara y dividir 1000 ms para saber el numero de cámaras que puede manejar con soltura , en este caso seria 177,35 ms por cámara , que al dividirlo 1000 entre el valor resultante nos da que podria manejar 5,638 cámaras , no muy lejos de las seis cámaras instaladas , pero si bastante justo.
Adema del valor de interferencia el consumo de CPU era un poco alto.
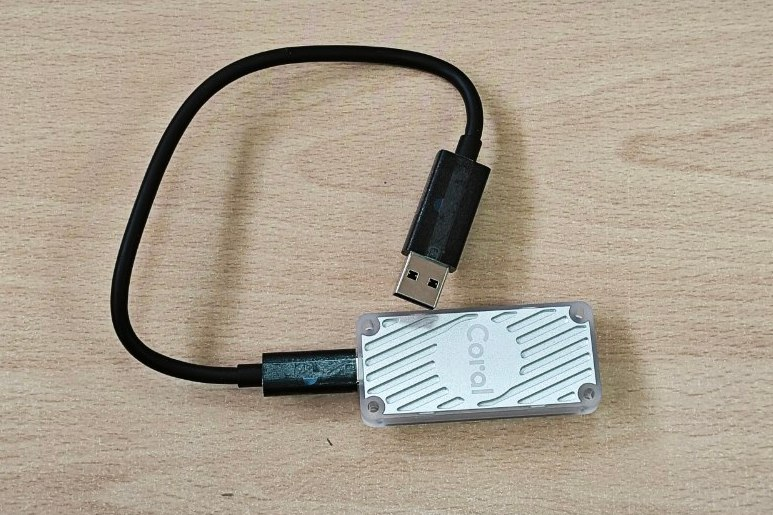
Por ello decidí añadirle un Coral USB para añadir un coprocesador Edge TPU al NAS
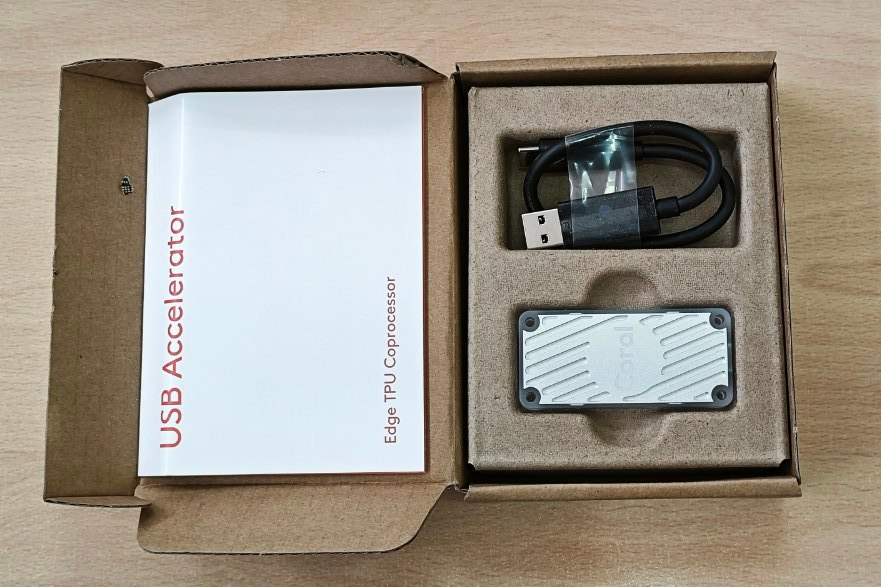
El tamaño es minúsculo y nada mas conectarlo al NAS lo reconoce perfectamente
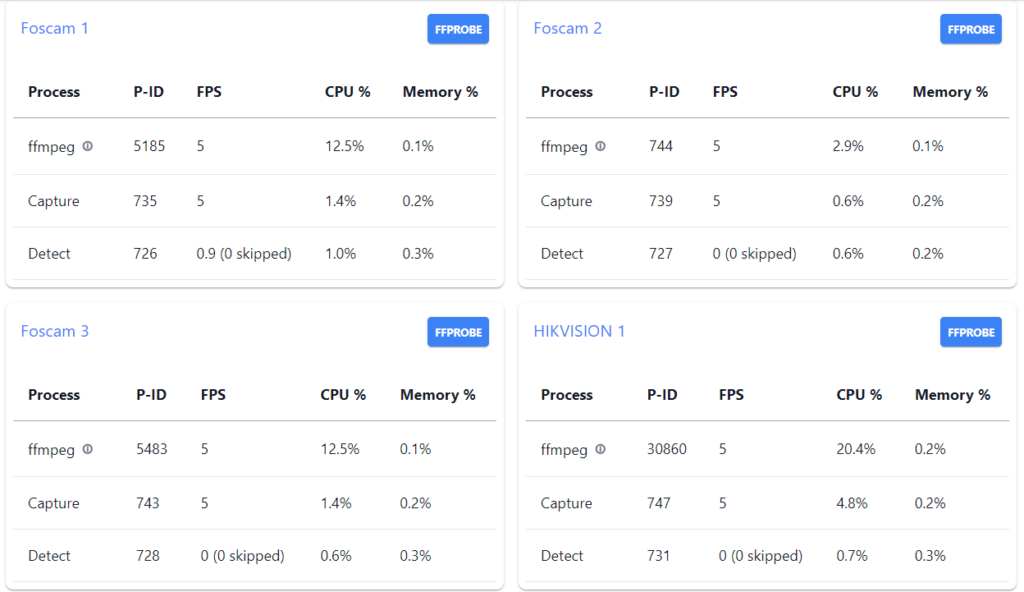
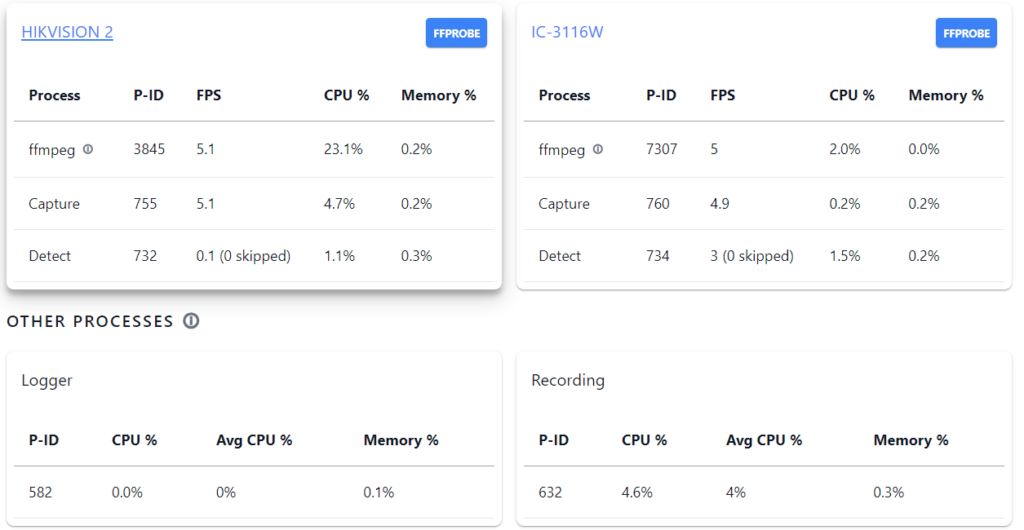
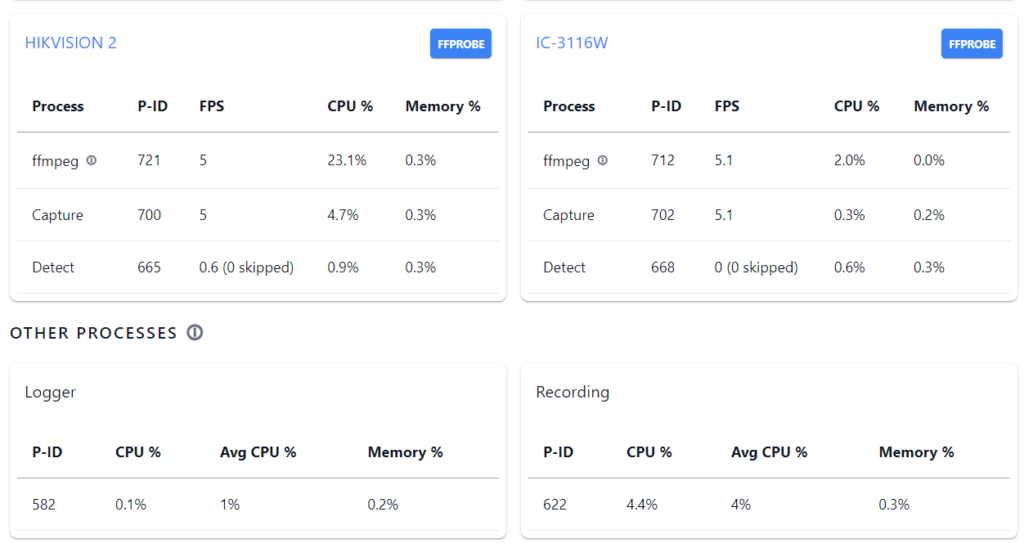
Estas son las estadísticas cámara a cámara antes de instalar el coprocesador Edge TPU
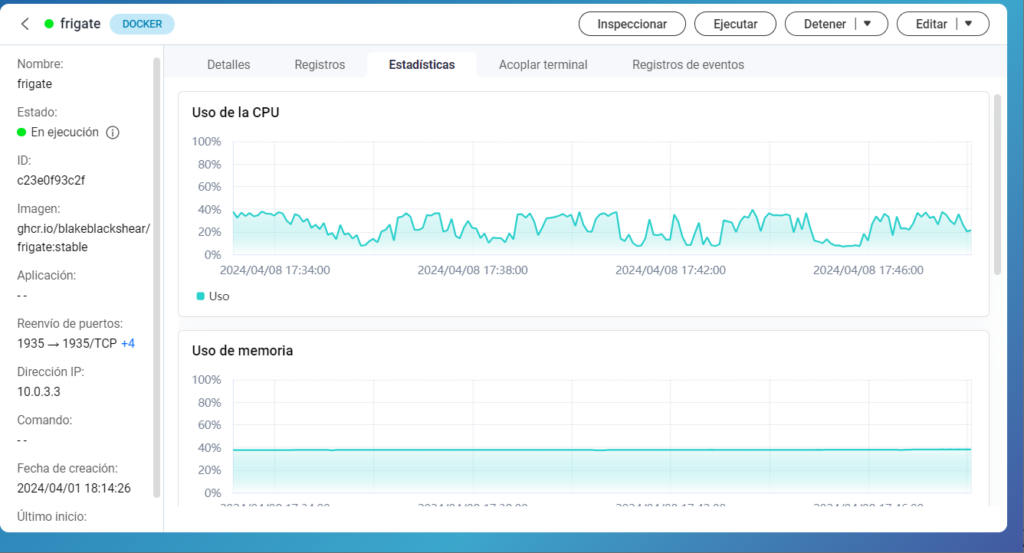
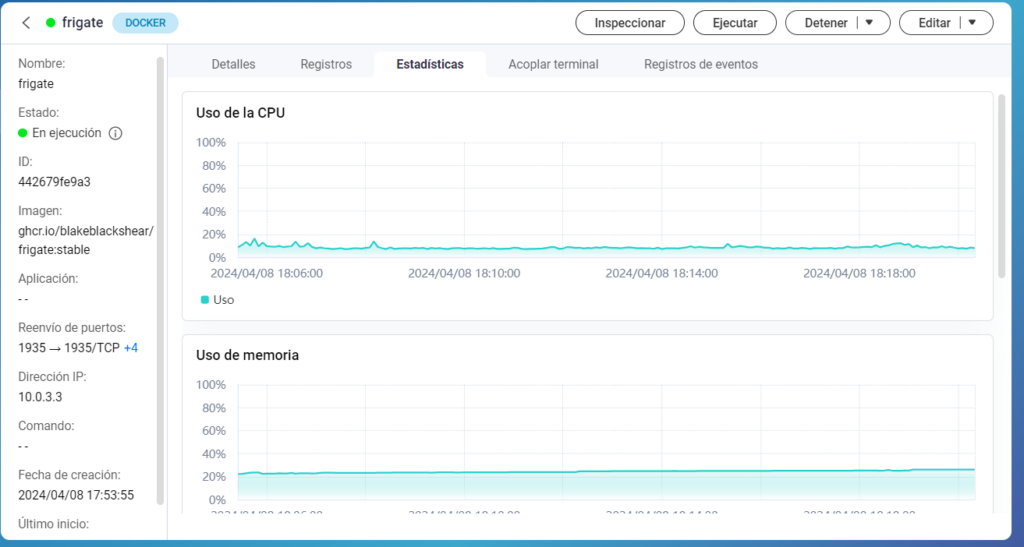
Y este el consumo del docker respecto al total de CPU del NAS , no bajaba del 20% del total llegando al 40%
Después de conectar Coral al USB de NAS tendremos que añadirlo en las sección detectors del fichero de configuración
detectors:
  coral:
    type: edgetpu
    device: usb
Tendremos que añadir esta linea en la creación del docker para que haga el Passthrough y Frigate tenga acceso al Coral instalado en el host.
--device=/dev/bus/usb:/dev/bus/usb # Passthrough of Coral USB TPU
Quedaria tal cual como este
docker run \
  --name=frigate \
  --shm-size=800m \
  --restart=always \
  --env=TZ='Europe/Madrid' \
  --device=/dev/bus/usb:/dev/bus/usb \
  --volume=/share/camaras/frigate/config:/config:rw \
  --volume=/share/camaras/frigate/media:/media/frigate:rw \
  --network=bridge \
  --privileged \
  --workdir=/opt/frigate \
  -p 1935:1935 \
  -p 15100:5000 \
  -p 8554:8554 \
  -p 8555:8555 \
  -p 8555:8555/udp \
  --label='com.qnap.qcs.network.mode=nat' \
  --label='com.qnap.qcs.gpu=False' \
  --memory="6g" \
  --cpus="6" \
  --detach=true \
  ghcr.io/blakeblackshear/frigate:stable
Al arrancar el docker buscaremos en el log como lo ha encontrado y como lo ha activado
[2024-04-08 21:02:13] frigate.detectors.plugins.edgetpu_tfl INFO    : Attempting to load TPU as usb
[2024-04-08 21:02:15] frigate.detectors.plugins.edgetpu_tfl INFO    : TPU found
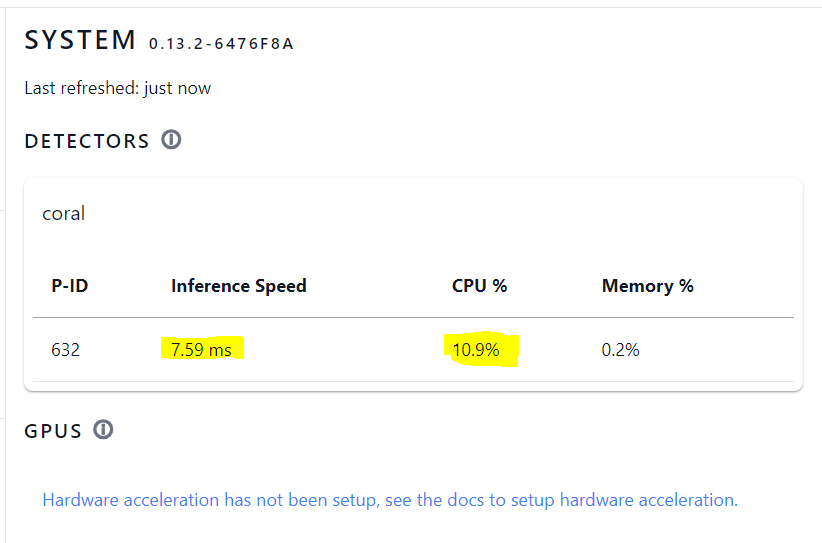
Ahora vemos que nuestro valor de interferencia ha bajado de 35,47 ms a 7,59 ms casi cinco veces menos , y el consumo de CPU ha bajado de 239,9 a 10.9% casi 22 veces menos que sin Coral , por lo que los datos no tienen discusión alguna.
Con este valor de interferencia actual , haciendo los cálculos de 1000 ms / ( 7.59 ms x 5 fps ) = 26,35 cámaras que podria manejar a la vez sin despeinarse
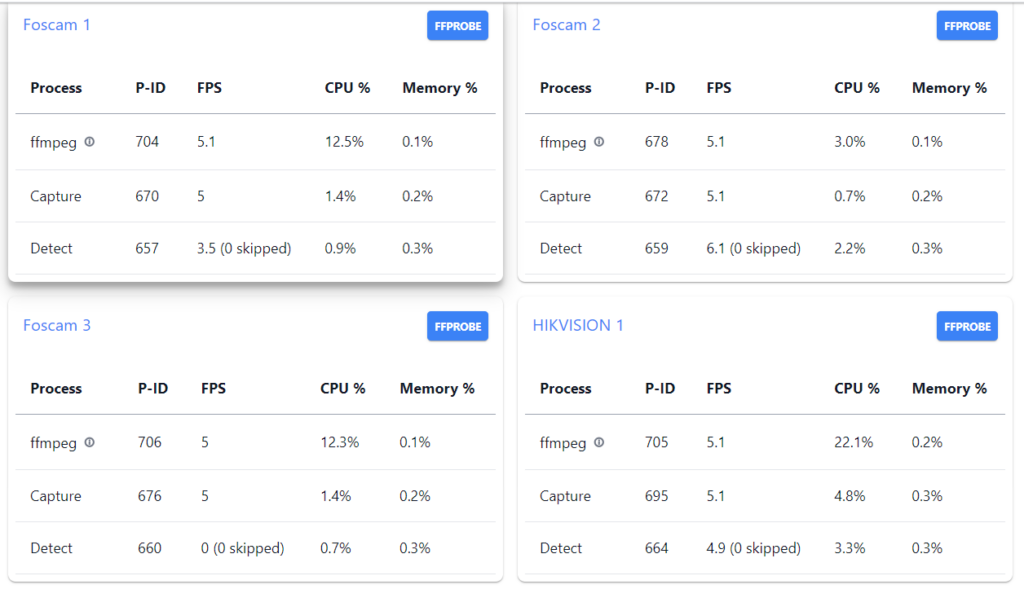
Estas serian las estadísticas de cada cámara con Coral instalado
Y donde también se ve perfectamente es en el impacto de consumo de este docker respecto a la CPU total del sistema , ha bajado a una media del 4% , que son cifras impresionantes para un NVR con seis cámaras y detección de movimiento activada
En resumen , la inversión esta mas que justificada
Y con esto y un bizcocho …….