Hace unos días me llegaron unos sonoff S26 , uno de ellos lo quería usar como Watchdog en el router ya que una vez por semana se queda frito de la chicha que le doy , hacer que de forma automatica se reinicie si no hay conexión , el primer paso fue meterle Tasmota y aplicar la plantilla del S26.
Después le puse una regla para que hiciera cuatro intentos de ping a cloudflare ( 1.1.1.1 ) cada cinco minutos y si fallaba apagase el router diez segundos y lo volviera a encender
Rule1
ON Time#Minute|5 DO backlog Ping4 1.1.1.1 ENDON
ON Ping#1.1.1.1#Success==0 DO Backlog Power1 0; Delay 10; Power1 1; ENDON

Rule1 1
Así quedaria la regla vista desde la consola de tasmota.

Al ponerla en marcha devuelve un error de Command Unknown
01:26:00.235 RUL: TIME#MINUTE|1 performs "backlog Ping4 1.1.1.1"
01:26:00.276 MQT: stat/tasmota_3F6ECB/RESULT = {"Command":"Unknown"}
Después de mirar vi que este comando en el firmware habitual de tasmota no esta implementado , hay que crear un firmware personalizado e incluir la directiva.
#define USE_PING
Toda la información para compilar nuestro firmware la podemos encontrar en este enlace https://tasmota.github.io/docs/Compile-your-build/
Una de las opciones mejores para no complicarnos la vida es usar un entorno web para compilar el firmware , el enlace es este
Si no tenemos cuenta en Gitpod tendremos que registrarnos con nuestra cuenta de Github.

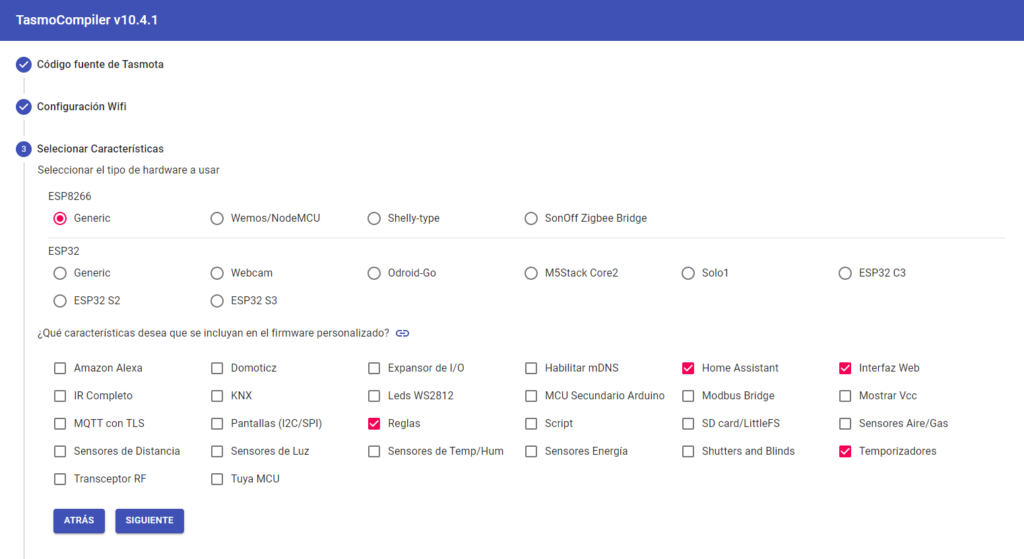
Una vez creado el entorno de desarrollo , una interface nos guiara paso a paso

Pondremos nuestras opciones para la red wifi

Elegimos el modulo donde va a ir el firmware , en este caso el genérico y añadimos las características que deseamos añadir.

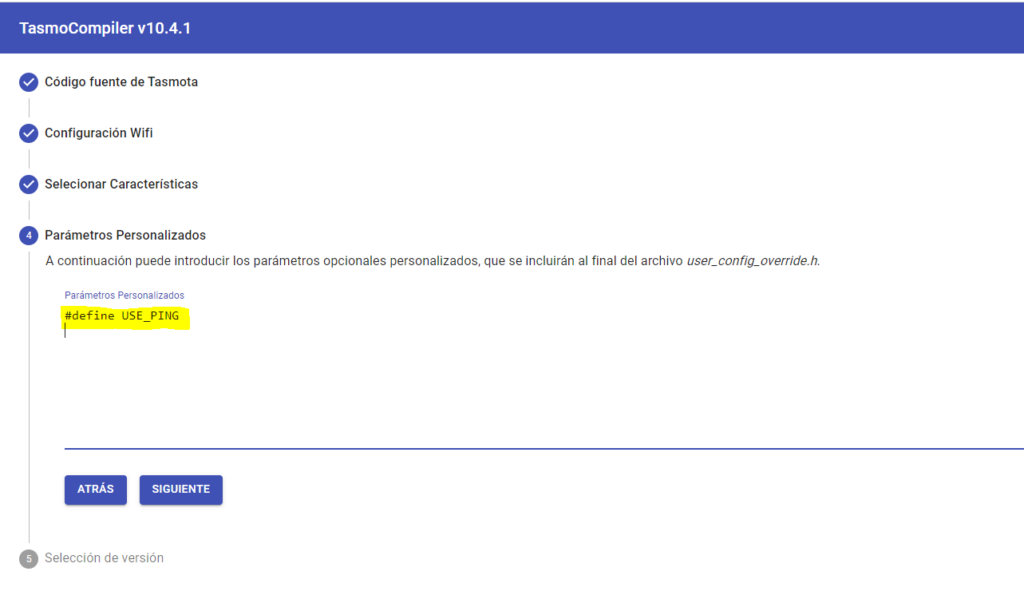
Este es el momento de añadir la directiva para que podamos usar el comando ping desde nuestra regla
#define USE_PING

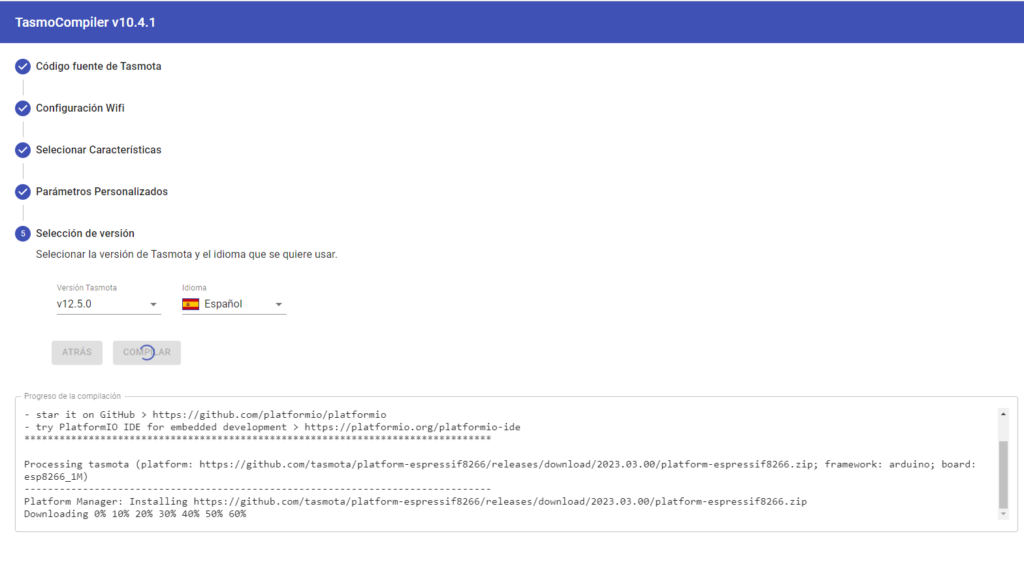
Si todo es correcto empezara la compilación del firmware con las opciones previamente configuradas

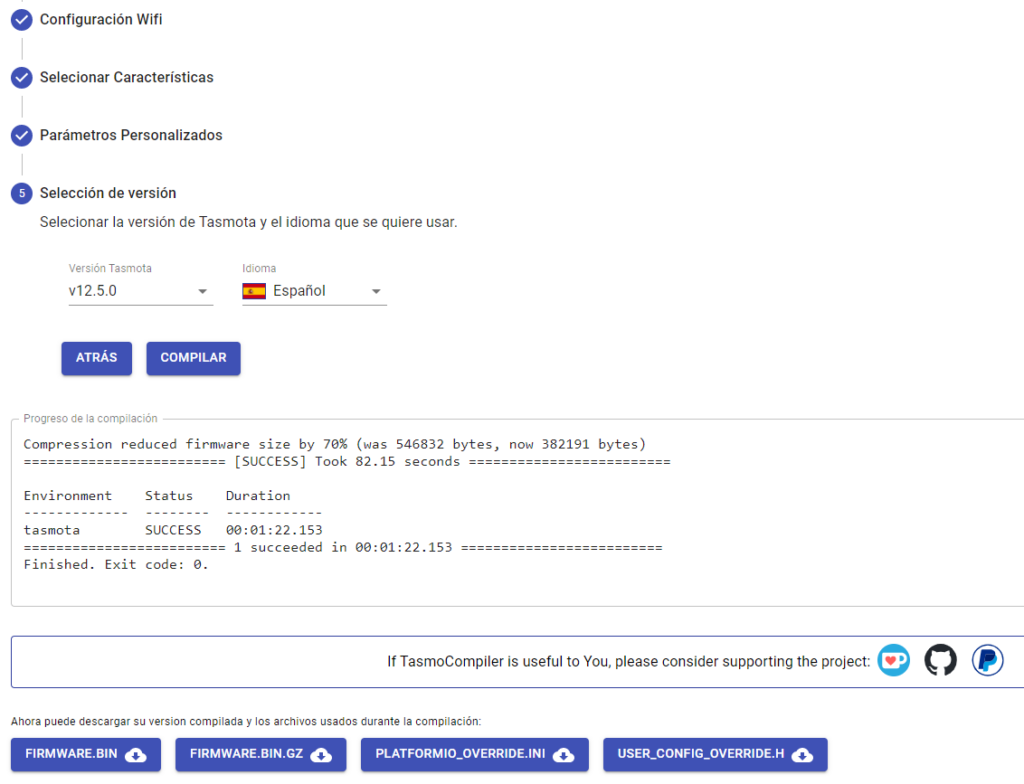
Al acabar nos dará la opción de bajar el bin del firmware y también bajarlo comprimido en gzip

Para evitar todos estos pasos os dejo aquí ambos ficheros ya preparados para su uso :
Procedemos a instalarlo desde la opción de subir el fichero

Empieza la actualización ….

Pero nos da un error de espacio !!!! 🙁

Para evitar este error descargaremos desde https://ota.tasmota.com/tasmota/ , el fichero tasmota-minimal.bin que nos permite actualizar fichero mas grandes posteriormente sin problemas
Lo subimos de nuevo ….

Una vez que arranque nos avisa de que esta bajo el firmware minimal y que actualicemos con nuestro firmware

Volvemos a subir nuestro firmware personalizado.

Ahora si , al arrancar ya nos arranca con nuestro firmware !!! 🙂

Volvemos a meter nuestra regla de nuevo y esta vez si responde al comando ping correctamente.

Aquí vemos como forcé para hacer pruebas apagando directamente la salida del relé del s26 , y al no responder hace el ciclo de fallo de ping , apagando el router , una espera de diez segundos y luego le da tensión de nuevo.
01:53:42.249 MQT: stat/tasmota_3F6ECB/POWER = OFF
01:53:46.414 MQT: tele/tasmota_3F6ECB/STATE = {"Time":"2023-06-13T01:53:46","Uptime":"0T00:04:46","UptimeSec":286,"Heap":16,"SleepMode":"Dynamic","Sleep":50,"LoadAvg":19,"MqttCount":1,"POWER":"OFF","Wifi":{"AP":1,"SSId":"CarpeDiem","BSSId":"88:C3:97:82:C4:98","Channel":11,"Mode":"11n","RSSI":100,"Signal":-21,"LinkCount":1,"Downtime":"0T00:00:03"}}
01:53:56.236 MQT: tele/tasmota_3F6ECB/STATE = {"Time":"2023-06-13T01:53:56","Uptime":"0T00:04:56","UptimeSec":296,"Heap":21,"SleepMode":"Dynamic","Sleep":50,"LoadAvg":19,"MqttCount":1,"POWER":"OFF","Wifi":{"AP":1,"SSId":"CarpeDiem","BSSId":"88:C3:97:82:C4:98","Channel":11,"Mode":"11n","RSSI":100,"Signal":-21,"LinkCount":1,"Downtime":"0T00:00:03"}}
01:54:00.280 RUL: TIME#MINUTE|1 performs "backlog Ping4 1.1.1.1"
01:54:00.318 MQT: stat/tasmota_3F6ECB/RESULT = {"Ping":"Done"}
01:54:04.476 MQT: tele/tasmota_3F6ECB/RESULT = {"Ping":{"1.1.1.1":{"Reachable":false,"IP":"1.1.1.1","Success":0,"Timeout":4,"MinTime":0,"MaxTime":0,"AvgTime":0}}}
01:54:04.502 RUL: PING#1.1.1.1#SUCCESS==0 performs "Backlog Power1 0; Delay 10; Power1 1;"
01:54:04.526 MQT: stat/tasmota_3F6ECB/RESULT = {"POWER":"OFF"}
01:54:04.531 MQT: stat/tasmota_3F6ECB/POWER = OFF
01:54:04.776 MQT: stat/tasmota_3F6ECB/RESULT = {"Delay":10}
01:54:05.801 MQT: stat/tasmota_3F6ECB/RESULT = {"POWER":"ON"}
01:54:05.804 MQT: stat/tasmota_3F6ECB/POWER = ON
01:54:06.448 MQT: tele/tasmota_3F6ECB/STATE = {"Time":"2023-06-13T01:54:06","Uptime":"0T00:05:06","UptimeSec":306,"Heap":21,"SleepMode":"Dynamic","Sleep":50,"LoadAvg":22,"MqttCount":1,"POWER":"ON","Wifi":{"AP":1,"SSId":"CarpeDiem","BSSId":"88:C3:97:82:C4:98","Channel":11,"Mode":"11n","RSSI":100,"Signal":-23,"LinkCount":1,"Downtime":"0T00:00:03"}}
01:54:16.262 MQT: tele/tasmota_3F6ECB/STATE = {"Time":"2023-06-13T01:54:16","Uptime":"0T00:05:16","UptimeSec":316,"Heap":21,"SleepMode":"Dynamic","Sleep":50,"LoadAvg":19,"MqttCount":1,"POWER":"ON","Wifi":{"AP":1,"SSId":"CarpeDiem","BSSId":"88:C3:97:82:C4:98","Channel":11,"Mode":"11n","RSSI":100,"Signal":-22,"LinkCount":1,"Downtime":"0T00:00:03"}}
Y aquí podemos ver como si responde al ping no hace nada y espera al siguiente ciclo
02:00:00.232 RUL: TIME#MINUTE|10 performs "backlog Ping4 1.1.1.1"
02:00:00.275 MQT: stat/tasmota_3F6ECB/RESULT = {"Ping":"Done"}
02:00:04.493 MQT: tele/tasmota_3F6ECB/RESULT = {"Ping":{"1.1.1.1":{"Reachable":true,"IP":"1.1.1.1","Success":4,"Timeout":0,"MinTime":5,"MaxTime":129,"AvgTime":36}}}
02:00:06.254 MQT: tele/tasmota_3F6ECB/STATE = {"Time":"2023-06-13T02:00:06","Uptime":"0T00:11:06","UptimeSec":666,"Heap":15,"SleepMode":"Dynamic","Sleep":50,"LoadAvg":46,"MqttCount":1,"POWER":"ON","Wifi":{"AP":1,"SSId":"CarpeDiem","BSSId":"88:C3:97:82:C4:98","Channel":11,"Mode":"11n","RSSI":100,"Signal":-22,"LinkCount":1,"Downtime":"0T00:00:03"}}
02:00:16.266 MQT: tele/tasmota_3F6ECB/STATE = {"Time":"2023-06-13T02:00:16","Uptime":"0T00:11:16","UptimeSec":676,"Heap":15,"SleepMode":"Dynamic","Sleep":50,"LoadAvg":46,"MqttCount":1,"POWER":"ON","Wifi":{"AP":1,"SSId":"CarpeDiem","BSSId":"88:C3:97:82:C4:98","Channel":11,"Mode":"11n","RSSI":100,"Signal":-22,"LinkCount":1,"Downtime":"0T00:00:03"}}
Al final después de varias pruebas comprobé que cinco minutos van un poco justo por lo que subiremos en tiempo de watchdog a 10 minutos y 8 intentos en el ping.
Nuestra regla quedaria así
Rule1
ON Time#Minute|10 DO backlog Ping8 1.1.1.1 ENDON
ON Ping#1.1.1.1#Success==0 DO Backlog Power1 0; Delay 10; Power1 1; ENDON

Rule1 1
Y con esto y un bizcocho ….
BONUS : Si queremos integrarlo en nuestro Home Assistant podemos hacerlo de la siguiente forma , primero un binary sensor mqtt por ejemplo así.
    # ENCHUFE ROUTER
    - state_topic: "stat/tasmota_3F6ECB/RESULT"
      value_template: "{{ value_json.POWER }}"
      availability_topic:  "tele/tasmota_3F6ECB/LWT"
      name: sensor_reinicio_enchufe_router
      device_class: "connectivity"
      payload_on: "ON"
      payload_off: "OFF"
      payload_available: "Online"
      payload_not_available: "Offline"
Y alguna automatización del estilo
- alias: "Router se ha reiniciado por el enchufe"
  initial_state: true
  trigger:
    platform: state
    entity_id: binary_sensor.sensor_reinicio_enchufe_router
    from: 'off'
    to: 'on'
    for: 00:10:00
  action:
    # Enviamos el mensaje por telegram
    - service: notify.notif_telegram_bot
      data:
        message: "\U000026A1\U000026A1 ¡Se ha reiniciado el router hace 10 minutos! \U000026A1\U000026A1"
A los diez minutos de que ha pasado de OFF a ON nos envia un mensaje por Telegram
